
General Electric XL44 Oven Manual: A Comprehensive Guide
This manual provides detailed instructions for operating and maintaining your General Electric XL44 oven, ensuring optimal performance and longevity․
It covers safety, features, operation, troubleshooting, and care—a complete resource for all users․
Welcome to the world of convenient and efficient cooking with your General Electric XL44 oven! This appliance is designed to deliver exceptional baking, broiling, and roasting results, simplifying meal preparation for everyday use and special occasions․ The XL44 model represents GE’s commitment to innovation and quality in kitchen appliances, offering a blend of user-friendly features and reliable performance․
This oven is engineered for versatility, catering to a wide range of culinary needs; Whether you’re a seasoned chef or a beginner cook, the XL44 provides the tools to create delicious dishes with ease․ Before operating, carefully review this manual to understand all functionalities and safety precautions․ Proper usage ensures both optimal performance and a long lifespan for your new GE oven․ Enjoy!
Safety Precautions
Your safety is paramount when using the GE XL44 oven․ Always exercise caution and follow these guidelines to prevent fire, electric shock, or personal injury․ Never operate the oven with a damaged cord or plug, and avoid using extension cords․ Ensure proper ventilation during operation, and keep flammable materials away from the oven’s vicinity․
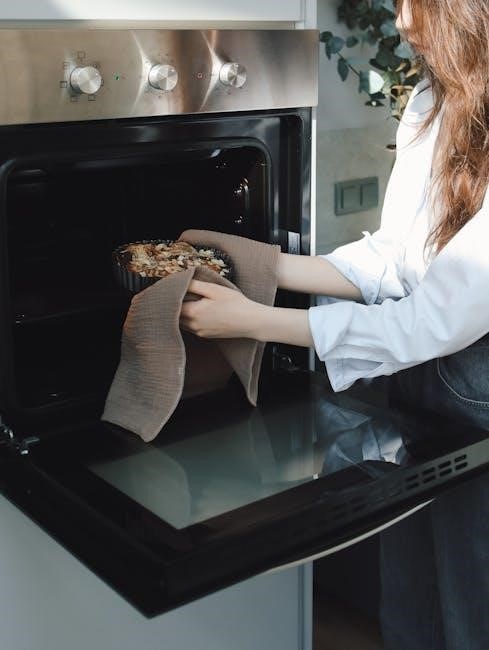
Supervise children closely when the oven is in use․ The oven surfaces become extremely hot during and after cooking; use oven mitts or pot holders when handling hot cookware․ Do not touch heating elements․ Disconnect the oven from the power supply before cleaning or performing maintenance․ A faulty self-clean cycle can pose risks; follow instructions carefully․ If you smell gas, immediately evacuate and contact emergency services․
Oven Features and Specifications
The General Electric XL44 oven boasts a range of features designed for versatile cooking․ It includes standard bake, broil, and roast settings, alongside a convenient convection baking option for even heat distribution․ The spacious interior accommodates large dishes, while the digital control panel offers precise temperature and timer control․
Specific dimensions are carefully engineered for standard kitchen cutouts․ Electrical requirements typically involve a standard 120V outlet, though detailed specifications are listed in the technical section․ The oven’s construction utilizes durable materials for long-lasting performance․ It also features a self-cleaning cycle for easy maintenance and a bright interior oven light for visibility․
Understanding the Control Panel
The GE XL44’s control panel provides intuitive access to all oven functions․ Familiarize yourself with the display indicators, symbols, and settings for seamless operation and control․
Control Panel Overview
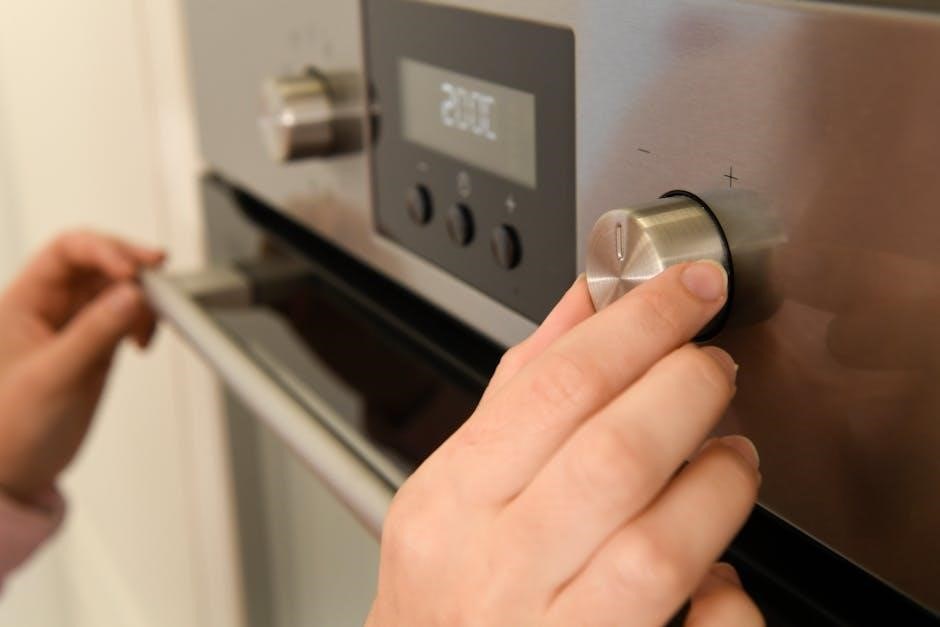
The General Electric XL44 oven features a user-friendly control panel designed for ease of operation․ It’s typically comprised of a digital display, function selection buttons, temperature controls, and timer settings․ The digital display clearly shows the current oven temperature, timer duration, and selected cooking mode․ Function buttons allow you to choose between baking, broiling, roasting, convection, and self-cleaning cycles․
Temperature adjustments are made using dedicated up and down arrow buttons, providing precise control over the cooking environment․ The timer function enables you to set a cooking duration or utilize a delay start feature for convenient meal preparation․ Additional buttons may include options for light control, warming settings, and specific convection modes․ Understanding the layout and functionality of each button is crucial for maximizing the oven’s capabilities and achieving optimal cooking results․ Refer to the display indicators for confirmation of selected settings․
Display Indicators and Symbols
The GE XL44 oven’s display utilizes various indicators and symbols to communicate oven status and settings․ A clock icon signifies the current time, while a temperature display shows the set or reached temperature․ Symbols indicate selected cooking functions – a loaf for bake, a flame for broil, and a fan for convection․ A timer symbol appears when the timer is active, displaying remaining cook time․
Error codes, displayed as “F” followed by numbers, signal specific malfunctions requiring attention (see troubleshooting section)․ A lock icon indicates the control panel is locked, preventing accidental operation․ A preheat indicator illuminates during the preheating phase․ Understanding these symbols ensures you accurately monitor the oven’s operation and respond appropriately to any alerts or error messages․ Refer to the manual for a complete list and explanation of all display indicators․
Setting the Clock
To set the clock on your GE XL44 oven, first press the “Clock” or “Time Set” pad on the control panel․ The hour display will begin to flash․ Use the number pads to enter the correct hour, ensuring you observe AM or PM․ Press “Clock” or “Time Set” again to confirm the hour․ The minute display will then flash; enter the correct minutes using the number pads․
Press “Clock” or “Time Set” one final time to save the minute setting and return to the normal display․ Accurate timekeeping is crucial for utilizing the oven’s timer and delay start functions․ If the oven experiences a power outage, you may need to reset the clock․ Refer to the control panel overview for specific button locations on your model․
Operating Instructions
This section details how to effectively utilize the GE XL44 oven’s baking, broiling, roasting, and convection functions for diverse cooking needs and optimal results․
Baking Functions
The GE XL44 oven offers several baking functions to accommodate various recipes․ Traditional Bake utilizes heat from the bottom element for consistent, even cooking – ideal for cakes, cookies, and casseroles․ Convection Bake, discussed in detail later, provides faster and more uniform results․
To use the Traditional Bake function, simply select “Bake” on the control panel, set the desired temperature, and press “Start․” Preheating is recommended for optimal results, indicated by the “Preheat” light․ For best outcomes, position oven racks in the center of the oven․ Always consult your recipe for specific temperature and time guidelines․ Remember to use oven-safe cookware and avoid overcrowding the oven cavity for even heat circulation․
Experiment with different rack positions to achieve your desired level of browning․
Broiling Functions
The GE XL44 oven features both standard and high broil functions, utilizing the top heating element for intense, direct heat․ Broiling is perfect for quickly browning the tops of dishes, melting cheese, or cooking thinner cuts of meat․ Always use broil-safe cookware, such as a broiler pan, to prevent flare-ups and ensure proper ventilation․
To broil, select either “Broil” or “High Broil” on the control panel․ Position the oven rack appropriately – closer for faster browning, further away for slower cooking․ Keep the oven door slightly ajar during broiling to prevent overheating and maintain proper temperature control․ Monitor food closely, as broiling happens rapidly․
For optimal results, avoid using dark or non-reflective cookware, as it can absorb too much heat․ Remember to turn food halfway through the broiling process for even cooking․
Roasting Functions
The GE XL44 oven’s roasting function is designed for cooking larger cuts of meat, poultry, or vegetables, achieving tender and flavorful results․ Unlike broiling, roasting utilizes a lower, more consistent heat, circulating air around the food for even cooking throughout․ This method helps retain moisture, preventing dryness․
To utilize the roast setting, select “Roast” on the control panel and set the desired temperature․ A roasting rack within a pan is recommended to elevate the food, allowing for better air circulation․ Preheating is generally not required, but can reduce overall cooking time․
Monitor internal temperature with a meat thermometer for accurate doneness․ Basting periodically during roasting enhances flavor and moisture․ The XL44’s roasting function delivers consistently delicious results․
Convection Baking
The GE XL44 oven features a convection baking mode, utilizing a fan to circulate hot air throughout the oven cavity․ This results in faster, more even cooking and browning compared to traditional baking․ Convection is ideal for baking multiple trays of cookies, roasting vegetables, or achieving a crispy crust on pies and breads․
To activate convection baking, select the “Convection Bake” option on the control panel․ Reduce the recipe’s recommended baking temperature by 25°F and check for doneness slightly earlier than the stated time․ Using convection often reduces cooking time by approximately 20-25%․
Ensure adequate space around food items for optimal air circulation․ Convection baking delivers professional-quality results with enhanced efficiency․
Using Oven Settings
Explore the GE XL44’s versatile settings—temperature control, timers, delay start, and the self-cleaning cycle—to customize your cooking experience and maintain optimal oven performance․
Temperature Settings
The GE XL44 oven offers precise temperature control for various cooking needs․ To set the desired temperature, use the control panel’s up and down arrow keys․ The display will show the set temperature, ranging from a warm 170°F (77°C) for proofing dough to a high 550°F (288°C) for broiling and pizza making․
Ensure the selected temperature aligns with your recipe’s requirements․ For baking, typical temperatures range between 325°F (163°C) and 375°F (190°C)․ Roasting often utilizes higher temperatures, around 350°F (177°C) to 450°F (232°C)․ Always preheat the oven before placing food inside for consistent results․ The oven will automatically maintain the set temperature throughout the cooking process, providing even heat distribution․ Remember to adjust cooking times accordingly when altering the temperature․
Timer Functions
The GE XL44 oven features versatile timer functions to assist with meal preparation․ A ‘Kitchen Timer’ operates independently of the oven’s cooking functions, useful for timing other tasks․ To activate, press the ‘Timer’ pad, enter the desired time using the number keys, and press ‘Start’․ The timer will count down, and an audible alarm will sound when finished․
The ‘Cook Time’ function allows you to set a specific cooking duration; the oven will automatically shut off when the time expires․ ‘Delay Start’ lets you program the oven to begin cooking at a future time․ Utilize these features for convenient and precise cooking․ Always double-check the timer settings before initiating any function to ensure accurate operation․
Delay Start
The Delay Start function on your GE XL44 oven allows for convenient, pre-programmed cooking․ To utilize this feature, first set the desired cooking function, temperature, and cook time․ Then, press the ‘Delay Start’ pad․ Use the number keys to input the desired start time – the time you want the oven to begin cooking․ Press ‘Start’ to activate the delay․
Ensure the oven clock is accurately set for proper operation․ The oven will remain in a standby mode until the programmed start time is reached, then automatically initiate the cooking cycle․ Avoid using Delay Start with perishable foods; prioritize food safety․ Always verify the settings before activating to prevent unexpected operation;
Self-Cleaning Cycle
The GE XL44 oven features a self-cleaning cycle utilizing high temperatures to burn off food residue․ Before initiating, remove all racks, cookware, and any loose debris from the oven interior․ Ensure the oven door can fully lock; do not attempt to open it during the cycle․ Select the ‘Self Clean’ function on the control panel, and choose the desired cleaning duration – typically 2 to 4 hours․
The oven door will automatically lock for safety․ A high temperature will be reached, so avoid the oven area during operation․ Once complete, the oven will cool, and the door will unlock․ Wipe away any remaining ash with a damp cloth․ Proper ventilation is crucial during the self-clean cycle․
Troubleshooting Common Issues
This section details solutions for typical problems with your GE XL44 oven, including heating failures, error codes, control panel malfunctions, and self-clean issues․
Oven Not Heating
If your GE XL44 oven isn’t heating, first verify the power supply – ensure the oven is properly plugged into a functioning outlet and the circuit breaker hasn’t tripped․ Next, check the control panel to confirm the oven is set to an appropriate baking or broiling function and temperature․
A faulty oven temperature sensor can also prevent heating; if suspected, it may require replacement by a qualified technician․ Inspect the bake element and broil element for any visible signs of damage or breakage․
Furthermore, a malfunctioning control board or relay switch could be the root cause․ Do not attempt to repair electrical components yourself; always consult a certified appliance repair professional for diagnosis and repair to avoid potential hazards and ensure safe operation of your oven․
Error Codes and Meanings
The GE XL44 oven utilizes error codes to signal specific malfunctions, aiding in diagnosis and repair․ A code like “F1” might indicate a temperature sensor failure, requiring sensor replacement․ “F2” could point to a faulty heating element, necessitating element inspection and potential substitution․
“F3” often signals an issue with the control board, demanding professional assessment․ Error code “F4” may relate to a door switch malfunction, impacting oven operation․ Always consult the complete error code list within this manual or on the GE Appliances website for precise definitions․
Attempting repairs based solely on error codes without proper knowledge is discouraged; professional service is recommended․ Record the error code before contacting support for efficient assistance․
Control Panel Malfunctions
If the GE XL44 oven’s control panel becomes unresponsive, first attempt a power cycle – disconnect the oven from the power source for five minutes, then reconnect․ A frozen display might necessitate a reset; consult the manual for specific reset procedures․
If buttons fail to register input, check for obstructions or debris․ Intermittent flickering of the display could indicate a loose connection or failing control board․ Repeated or widespread malfunctions strongly suggest a component failure requiring professional diagnosis․
Avoid self-repair of the control panel due to the risk of electrical shock or further damage․ Document the specific issues observed before contacting GE appliance service for assistance․
Self-Clean Cycle Problems
If the GE XL44 oven’s self-clean cycle fails to initiate, ensure the door is completely latched and that no items remain inside the oven cavity․ A faulty door latch is a common cause․ If the cycle starts but doesn’t complete, a power interruption might be the issue; check your circuit breaker․
Excessive smoke during self-cleaning can indicate accumulated grease or food spills – manually remove large debris before running the cycle․ Error codes displayed during or after the cycle should be referenced in the manual’s troubleshooting section․
Persistent problems necessitate professional service, as a malfunctioning self-clean system can pose a safety hazard․ Never attempt to open the door during the cycle․
Maintenance and Care
Regular cleaning extends the life of your GE XL44 oven․ This section details interior/exterior cleaning, light replacement, and proper door upkeep procedures․
Cleaning the Oven Interior
To maintain peak performance, regularly clean the interior of your GE XL44 oven․ For light cleaning, a damp cloth with mild dish soap is often sufficient․ Avoid abrasive cleaners, as they can damage the enamel surface․ For baked-on spills, create a paste of baking soda and water, apply it to the affected area, and let it sit for 20-30 minutes before gently scrubbing․
The XL44 also features a self-cleaning cycle (refer to the ‘Self-Cleaning Cycle’ section for detailed instructions)․ Before initiating the self-clean, remove all racks, cookware, and any loose debris․ Ensure adequate ventilation during the self-clean process, as it generates high temperatures and may produce odors․ After the cycle completes and the oven cools, wipe away any remaining ash with a damp cloth․
Always disconnect the power supply before performing any interior cleaning to prevent electrical shock․
Cleaning the Oven Exterior
Maintaining a clean oven exterior enhances its appearance and prevents buildup․ Regularly wipe down the control panel, door, and sides with a soft, damp cloth and mild detergent․ Avoid using abrasive cleaners or scouring pads, as these can scratch the surface․ For stainless steel exteriors, use a stainless steel cleaner specifically designed for appliances to prevent streaks and maintain shine․
Pay close attention to the area around the oven door, where grease and food splatters may accumulate․ A degreasing cleaner can be helpful for removing stubborn residue․ Ensure the oven is cool before cleaning․ Always disconnect the power supply before cleaning the exterior to avoid any electrical hazards․
Dry all surfaces thoroughly after cleaning to prevent water spots․
Replacing the Oven Light
If the oven light fails, replacement is a straightforward process․ Always disconnect the oven from the power supply before attempting any repairs․ Locate the oven light cover, typically found in the upper rear section of the oven interior․ Remove the cover – it may twist or lift off․ Carefully unscrew the old light bulb, noting its wattage and type for replacement․
Use only oven-safe light bulbs of the correct wattage, as specified in the oven’s specifications․ Installing an incorrect bulb could pose a fire hazard․ Screw in the new bulb securely, but do not overtighten․ Replace the light cover, ensuring it is properly seated․ Reconnect the oven to the power supply and test the new light․
Door Maintenance
Proper door maintenance ensures efficient oven operation and prevents heat loss․ Regularly inspect the door gasket (seal) for any signs of damage, such as cracks, tears, or gaps․ A damaged gasket compromises oven temperature and energy efficiency․ To clean the gasket, use a damp cloth and mild detergent; avoid abrasive cleaners․
Check the door hinges for smooth operation․ If the door feels stiff or doesn’t close properly, the hinges may require lubrication․ Apply a small amount of high-temperature lubricant to the hinge points; Avoid forcing the door, as this could damage the hinges or alignment․ Ensure the door closes securely and evenly to maintain consistent baking temperatures․

Technical Specifications
This section details the XL44 oven’s dimensions, weight, electrical requirements, and warranty details, providing essential technical information for installation and service․
Dimensions and Weight
Understanding the physical specifications of your GE XL44 oven is crucial for proper installation and ensuring it fits seamlessly into your kitchen space․ The oven’s exterior dimensions typically measure approximately 27 inches in width, 28․5 inches in depth (without the handle), and 30 inches in height․ These measurements are subject to slight variations depending on the specific model configuration․
The overall weight of the XL44 oven, when fully assembled, generally falls between 140 and 160 pounds․ This substantial weight is due to the robust construction and the inclusion of high-quality components․ Always consult the detailed specification sheet included with your oven for the most accurate and up-to-date dimensional and weight information; Proper handling and a stable installation surface are essential for safe operation․
Electrical Requirements
Ensuring your kitchen’s electrical system meets the GE XL44 oven’s requirements is paramount for safe and efficient operation․ This oven typically requires a dedicated 240-volt electrical circuit, with a corresponding amperage rating of 40 or 50 amps, depending on the specific model․ A standard 120-volt outlet is insufficient and will not power the oven․
The XL44 oven necessitates a three-prong grounding plug for safety․ Never attempt to alter or remove the grounding prong․ It is strongly recommended to have a qualified electrician install a dedicated circuit and outlet if one is not already available․ Incorrect electrical connections can pose a serious fire hazard and void the oven’s warranty․ Always verify voltage compatibility before operation․
Warranty Information
Your General Electric XL44 oven is covered by a limited warranty, protecting against manufacturing defects in materials and workmanship․ The standard warranty period typically extends for one year from the date of original purchase, covering parts and labor for repairs․ Specific warranty details, including extended warranty options, are outlined in the separate warranty document included with your oven․
To initiate a warranty claim, retain your proof of purchase and contact GE’s authorized service center․ The warranty does not cover damage resulting from misuse, improper installation, accidents, or normal wear and tear; Modifications or repairs performed by unauthorized personnel will also void the warranty․ Always register your appliance for optimal warranty service․